Waypoints and Route Editing
Via points and shaping points
WaypointGuru uses two kinds of route points:
- Via points
 are places you plan to start from, stop at, or finish at.
 - Shaping points
 are used to guide the route without being treated as stops.
The first and last points in a route are always via points. The same waypoint model is used for standalone routes and for the active day inside a trip.
In the waypoint list, each via point after the start shows:
- Distance and riding time from the previous via point
- Accumulated distance from the start of the route
- Accumulated time from the start of the route, including layovers

Editing from the waypoint list
The waypoint list is the quickest way to refine the structure of a route.
- Click a waypoint description to search for a different location.
- Click the time field to change the departure time for the first waypoint or the layover time for a via point.
- Hover over a waypoint and use the three-dot menu to delete it or open it in Google Maps.
- Drag waypoints up or down to reorder them.
- Click a waypoint icon to switch between a via point and a shaping point.
When a trip is open, only the expanded active day is editable. Collapsed days stay visible in the day list and on the map, but they are not edited until you expand them.
Editing from the map
You can also edit the route directly on the map.
- Drag any waypoint on the map to move it.
- Drag anywhere on the route to add a shaping point.
- Click anywhere on the map to add a via point at that location.
- When you click the map, WaypointGuru can offer
Add as start point,Add as intermediate waypoint, orAdd as end point, depending on the current route. - If you add a middle point, WaypointGuru chooses the best position in the route automatically.
In a trip, map editing applies to the active day only. Collapsed day overlays are shown as trip context and cannot be dragged.
Route and day action menus
Standalone route actions are in the three-dot route actions menu beside the route name.
Trip day actions are in the three-dot menu on each day header. The active day menu can include editing commands such as reversing waypoints or clearing all waypoints. Collapsed day menus can still be used for read-only actions such as copying a link, copying a snapshot link, exporting that day to GPX, or opening that day in Google Maps.
Route defaults
Curviness and road avoidances are set for the whole route in the route properties dialog, which you open with Properties in the route actions menu.
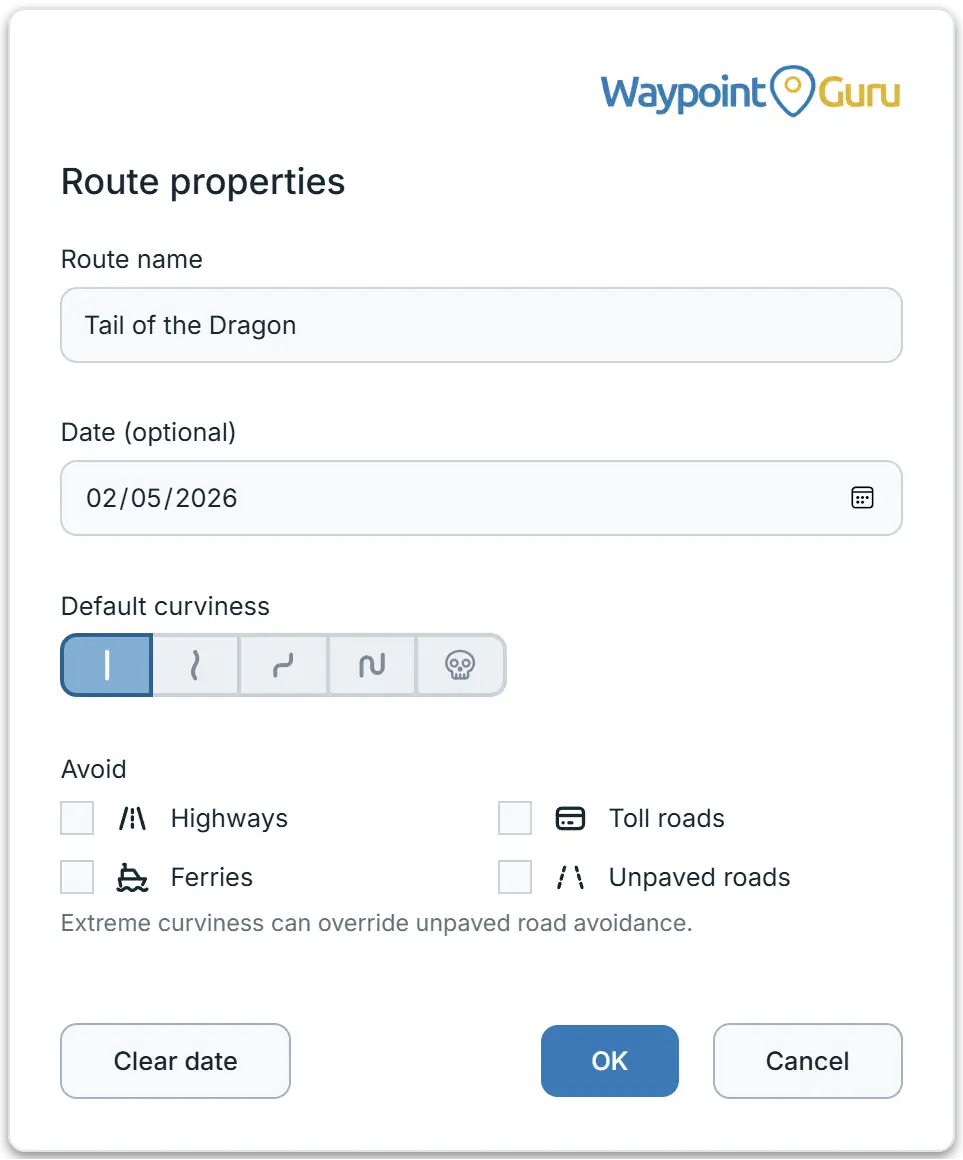
Default curviness sets how strongly the whole route favors winding roads.
From left to right, the levels are:
None- normal routing, optimized for a balance of time and distance.Low- curvy roads are given some priority. Straight roads and highways are slightly penalized.Moderate- curvy roads are given more priority. Straight roads and highways are more strongly penalized.High- curvy roads are given significant priority. Straight roads and highways are significantly penalized.Extreme- curvy roads are given extreme priority. Straight roads and highways are extremely penalized, and this may result in impractical routes.
For all levels except Extreme, unpaved roads are somewhat penalized. At Extreme they are not, so unless you also avoid unpaved roads, those routes are very likely to include unpaved sections.
Under Avoid, select Highways, Toll roads, Ferries, or Unpaved roads to steer the route away from them. These are strong preferences rather than hard rules: a road of that kind can still turn up where avoiding it would mean a much longer route.
In a trip, each day carries its own defaults. Open Day properties... from the day menu to set them. A day's curviness and avoidance settings can only be changed while that day is open in the editor.
Section routing options
Any section of a route can override the route defaults, so you can make one stretch curvier, or allow a ferry on a single leg, without changing the rest of the route.
Move the pointer over the waypoint list and a small control appears between two waypoint entries, for the section between those two waypoints. When a section has routing options applied, the control stays visible and shows one icon per active setting:
- Muted icons are inherited from the route defaults.
- Highlighted icons are set for this section.
- A struck-through icon is something this section allows that the route as a whole avoids.
Click the control to open the section options.
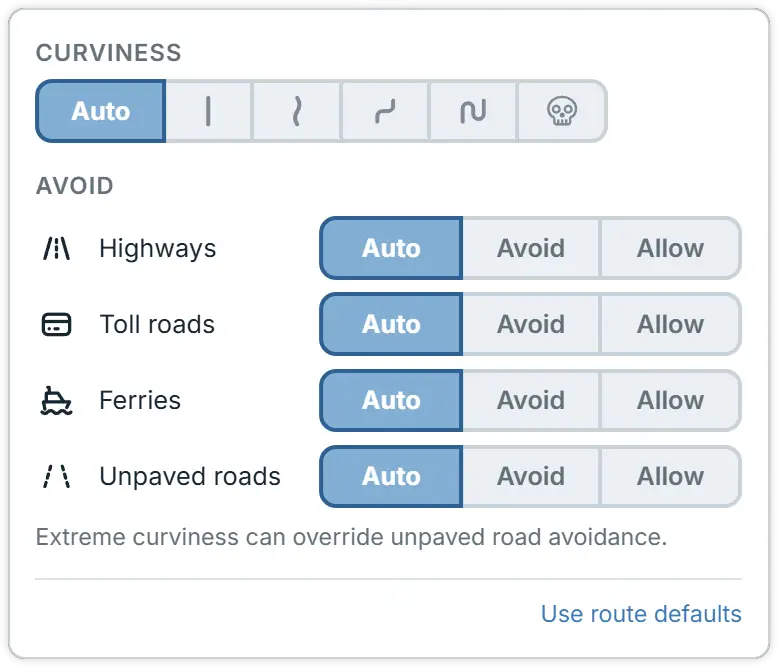
Under Curviness, Auto follows the route's default curviness, and the five levels after it apply to this section only. They behave exactly as described above.
Under Avoid, each of Highways, Toll roads, Ferries, and Unpaved roads has three settings:
Auto- follow the route default for that road type.Avoid- avoid it on this section, even where the route allows it.Allow- allow it on this section, even where the route avoids it.
Use route defaults clears every override on the section and returns it to the route defaults.
Undo and redo
Use your browser's Back and Forward actions to undo or redo route edits.